
Best Sealant for Natural Stone: How to Prevent Staining and Discoloration
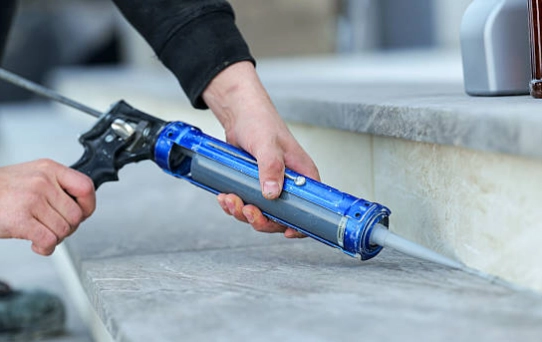
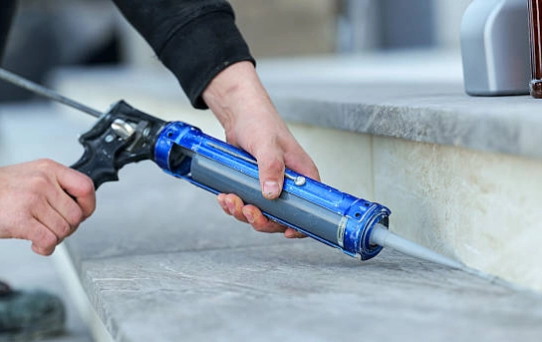
Natural stone looks dense, but many types absorb oils, cleaners, primer residue, or mobile components from a joint. The result is familiar: a dark band beside the sealant, a yellow shadow on pale stone, or a clean joint that looks dirty after a few weeks.
A “neutral cure” label is not enough. Compatibility, movement, exposure, and application control all matter.
Why Can Sealant Stain or Discolor Natural Stone?
Most staining begins below the visible surface. Once a dark edge appears, wiping usually does little.
Migration Into Porous Stone
Some sealant components can move into the pores beside the joint. On white marble or pale limestone, this often appears as an even grey or oily halo. The sealant may be fully cured and firmly bonded. The joint works, but the finish has failed.
On one lobby installation, the marble looked acceptable during sealing. Two weeks later, every joint showed a narrow dark border. Material had migrated into the stone.
Porosity is only part of the issue. Resin treatment, polishing, moisture, and stone batch can change the result.
Other Sources of Discoloration
Not every mark comes from the sealant formula. Primer applied too widely can darken the edge. An aggressive cleaner may leave a patch resembling oil staining. Moisture behind exterior stone can also create temporary dark areas after rain.
Cleaner residue, adhesive behind the panel, dirty tape, and mold in damp joints are also common. A uniform halo suggests migration. Random patches usually point to moisture or surface contamination.
Which Type of Sealant Is Best for Natural Stone?
The practical choice is a stone compatible, non-staining joint sealant with enough movement capability for the detail. That description is more useful than a chemistry name alone.
General purpose acid-cure silicone is not a sensible starting point for sensitive stone. Neutral-cure silicone may be suitable, but neutral curing does not automatically mean non-staining. Stone grade silicone is usually safer because it is intended for porous substrates.
Polyurethane and hybrid sealants can also work. Check staining behavior, UV resistance, movement class, and primer requirements rather than accepting or rejecting them by category.
For façade work, staining data is valuable. ASTM C1248 is often referenced, but project stone testing is still needed.
How Do the Stone Type and Application Affect Your Choice?
A sealant that performs well around dark granite may leave an unacceptable edge on honed limestone.
Consider the Stone’s Porosity and Sensitivity
Pale, porous stone deserves more caution. White marble, beige limestone, travertine, and sandstone show small color changes clearly.
Surface finish matters. Honed stone holds residue near the joint. Polished stone is easier to wipe, but subsurface staining is often more obvious. Resin filled stone may behave differently from untreated stone of the same type.
Use the actual project sample. A trade name says little about absorption.
Match the Sealant to the Joint
Exterior façade joints need UV resistance, weather resistance, and enough movement capacity for temperature changes. Wet area joints face moisture, cleaners, soap residue, and mold. Countertop perimeter joints may move less but have stricter appearance requirements.
Joints between stone and aluminum, glass, concrete, or coated metal need adhesion to both sides. A 10 mm vanity joint and a 25 mm façade joint are not the same system.
What Should You Check Before Buying a Stone Sealant?
Read the product data sheet with the actual joint in mind. Check:
- Suitability for natural stone, marble, granite, or porous substrates
- Non-staining or lowstaining test information
- Interior or exterior use
- Movement capability and modulus
- Adhesion to every material in the joint
- Primer requirements
- UV, weather, and moisture resistance
- Application temperature and curing conditions
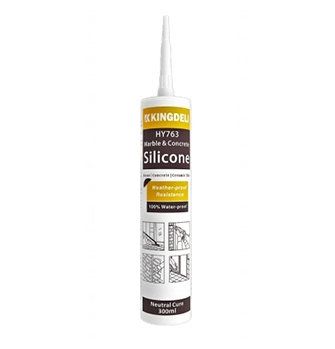
For marble and concrete details, KINGDELI’s HY-763 silicone sealant can be considered because it is intended for stone related sealing and uses a neutral curing system. Its value is not that it removes testing. It gives the specifier a product aimed at the problem instead of a general purpose silicone chosen by guesswork.
How Should You Test the Sealant Before Full Application?
Testing should copy the job.
Use stone from the actual batch. Include the proposed cleaner, primer, backing rod, masking tape, and adjacent substrate. Make a small joint with roughly the planned width and depth, then cure it under realistic conditions.
Inspect after curing and again several days later. Look for dark edging, yellowing, oily marks, tack, and adhesion loss. Exterior samples should also see sunlight and moisture.
A mock up may feel slow. Replacing stained panels is slower.
How Do You Apply Sealant Without Causing Stains?
A suitable product can still be defeated by poor preparation. Most visible failures begin at the joint edge.
Prepare the Joint Correctly
The joint must be dry, clean, and free from dust, polishing compound, old sealant, and loose material. Use only a cleaner approved for the stone and sealant. Flooding porous stone with solvent can carry contamination deeper.
Mask both sides neatly. Install the correct backing rod to control depth and avoid three sided adhesion. Where primer is required, apply a narrow film only to the bonding face. Primer spread onto visible stone is difficult to hide.
Clean gloves matter on pale stone. Finger marks often appear after handover, not during installation.
Apply and Tool the Sealant Carefully
Fill the joint continuously. Gaps and trapped air weaken the bead. Tool before skin formation, using enough pressure to wet the joint faces without spreading sealant over the stone.
A practical sequence is:
- Apply one continuous bead
- Tool once or twice
- Remove excess material before it smears
- Pull masking tape while the sealant is workable
- Protect the joint during curing
Curing time changes with temperature, humidity, bead depth, and chemistry. Follow the selected product’s data sheet.
What Common Mistakes Lead to Staining or Sealant Failure?
Common mistakes include:
- Assuming clear sealant cannot stain
- Treating every neutralcure silicone as stone safe
- Skipping the mockup
- Using an unapproved primer or cleaner
- Applying over damp or dusty surfaces
- Smearing sealant beyond the joint
- Ignoring joint width, depth, and movement
- Choosing by cartridge price alone
The cheap cartridge is rarely cheap once stone panels need replacement.
How Can You Tell Whether the Finished Joint Is Successful?
A good joint should look quiet. The stone beside it stays the same color. Adhesion is continuous. The bead has no cracks, bubbles, deep tool marks, or visible shrinkage.
Inspect after the stated curing period, not only on installation day. On exterior work, check again after rain or strong sun. If a dark edge begins to spread, stop further application and keep the test pieces, batch number, primer details, and site photos.
Conclusion — Choose by Compatibility, Not by Label Alone
Natural stone needs a sealant selected for the actual stone, joint, and exposure. “Neutral cure” is a starting point, not a complete specification.
A stone oriented product such as KINGDELI’s neutral-cure silicone may suit marble and concrete details where elastic sealing and low staining risk are required, but approval should still come from a project sample. Compatibility data, a realistic mock up, and controlled application matter more than the wording on the cartridge.
FAQ
Q: Can neutral-cure silicone stain natural stone?
Yes. Neutral curing does not automatically make a sealant non-staining.
Q: Is clear silicone safer for marble?
Not necessarily. Clear appearance says nothing about migration into porous stone.
Q: Does granite always require a stone grade sealant?
Some granite is dense, but certain varieties and finishes still stain. Testing remains sensible.
Q: Should primer be used on natural stone joints?
Only when required by the manufacturer or confirmed by adhesion testing. Excess primer can discolor visible stone.
Q: How long should a test sample be observed?
Inspect after full cure and again several days later. Exterior projects benefit from longer exposure to heat, sunlight, and moisture.